By: Alyssia Bialek
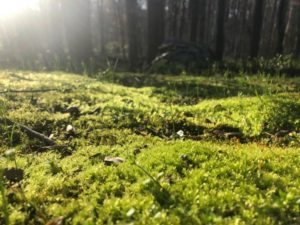
Hi everyone! My name is Alyssa, a long-time trip leader and short-time terrarium builder. During these times of quarantine, I’ve spent a lot of time walking through the forest in my backyard, taking in the plants and animals. I was thinking of ways to bring the beauty of what I saw into something that I could look at every day, and realized terrariums were the perfect craft for this! I am going to walk you through the process of making your first terrarium.
Preparation
Before you start, you will want to collect some items. Here are all the items that you will need to make the terrarium:
- A glass jar or vase. You can use a lid or keep it uncovered. Any size!
- Rocks of different sizes
- Soil from the ground or potting soil
- Moss and other small/slow-growing plants
- Plastic wrap
- Optional: sphagnum moss
- Optional: activated carbon/ lump wood charcoal
- Optional: decorating pieces such as plastic animals and seashells
Let’s go through the list and take a little trip to the forest!
Collecting
-
- I suggest grabbing a large Tupperware for your plants and a bucket to put the rocks in. I chose
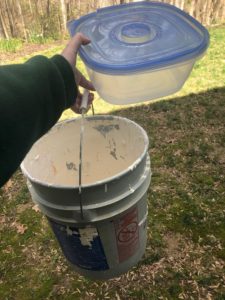
My collecting supplies. pretty large containers because I knew I would be making multiple terrariums, but you won’t need containers this big for a mason jar sized terrarium.
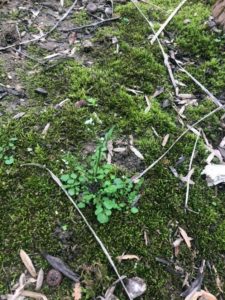
- Walk around and see what’s on the ground. If you are near water, head to the river or stream and grab some rocks from there. Grab large, medium, and small-sized rocks. In an urban environment, gravel works just as well! Look for any moss that catches your eye, as this will be the main plant in your terrarium. Try not to grab the whole clump of it though; leave plenty left so the patch will grow in later and you don’t completely deplete the resource. Look out for small plants like wildflowers and little ferns that you can take back with you as an accent element. Focus on small plants that you see growing in the shade or partial sun, as this will be the environment in your terrarium.
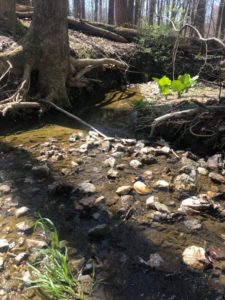
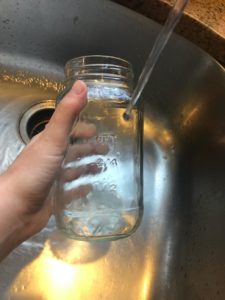
This is the stream behind my house where I went to get most of my rocks! - With materials in hand, head back to your hose or sink. Hose all the rocks off to make sure they are clean. It’s also a good idea to soak your plants in water to get the dirt off as well. While native soil will ensure that your plant does well in its new environment, it may have some large bugs that you do not want in your terrarium to start off with. Technically, you should use distilled water to soak the plants, because moss might not do well with the chlorine in tap water and could turn brown. I didn’t have any distilled water on hand, so I used tap water. Take that with a grain of salt though, and use distilled water to wash and water your plants if you have it available to you.
- If you’re using an old mason jar that had food in it like I was, you’ll likely have glue and stickers on the jar. Run it under hot water for a couple minutes and all of that should be scraped off pretty easily.
Getting the stickers off! - Now it’s time to build! Layering the terrarium is very important. Since this will be a contained ecosystem, you have to layer it to make sure that mold doesn’t build up and the water cycle can occur in your container.
- I suggest grabbing a large Tupperware for your plants and a bucket to put the rocks in. I chose
Layering
Rocks: The bottom rock layer will allow the water to stay at the bottom of the container in the between the rocks, making sure the soil doesn’t stay moist all the time and become putrid. Put some larger rocks in first and then fill out some of the cracks with some of the smaller rocks you collected.
Plastic wrap with holes poked in it: Cut a piece of plastic wrap the size of your container and poke a bunch of holes in it with a fork or something small and sharp. This layer prevents the soil from getting to the bottom rock layer. I skipped this step the first time, which is okay, but you will have soil seeping through the rocks which could eventually become a problem.
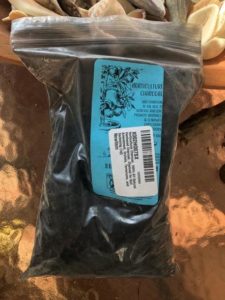
Activated carbon/ horticultural charcoal (optional): Activated carbon or horticultural charcoal is a great layer to add to a terrarium. Horticultural charcoal helps with drainage AND is a purifying agent that will help keep your terrarium healthy. You can buy it for cheap at a garden center, online, or at pet stores. No big deal if you don’t have it, but it could be worth the purchase if you want your terrarium to last.
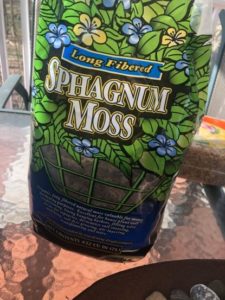
Sphagnum moss (optional): This moss layer is another barrier between the soil and the gravel and absorbs excess moisture itself. You can buy sphagnum moss from a garden store or get it online.
Soil: You have two options for the soil. Big decisions! You can use native soil from where you collected your plants or potting soil. The benefit of naïve soil is that you are using the soil that the plants are accustomed to and thrive in. They will likely do well in this soil and won’t die. However, you take a small risk using this soil with the microbes and other micro-fauna that could now be living in your small jar. Soil contains microbes, insect eggs, and lots of other organisms. These could be beneficial OR harmful to your terrarium. For example, if you end up having isopods in your soil, that’s great! They eat decaying matter and will help keep your terrarium clean. Good old rolley polleys. However, you could end up having insects that eat the leaves off of your plants. It’s a bit of a gamble, but I like seeing how much life is in a little bit of soil, so I usually use native soil. As an alternative, you can use potting soil. This won’t have any insects (probably) but since it is not the native home to your plants, they might not do as well.
Planting and Decorating
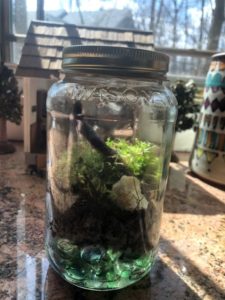
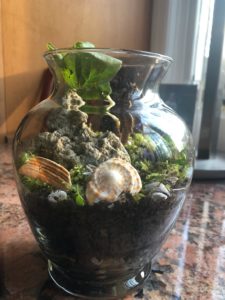
Finally, onto the fun part! This is where you get to be creative. I like starting with a base of “hardscape” elements. These could be seashells, large pieces of wood, pretty rocks, or figurines. A mason jar doesn’t hold much though, so if you’re starting there I suggest just adding a few accent rocks or one or two items (my personal favorite is plastic dinosaurs).
Next, add the moss around your accent elements. Finish it off with some little plants. Wildflowers are my favorite. Tweezers or a long stick could be helpful when adding these plants and reaching into the jar. Once all of your big elements are added, you can sprinkle in some small ones like tiny shells, pebbles, and crumpled leaves.
Care and Tips
- Keep your terrarium in indirect sunlight. The glass will amplify the sun’s rays, so do not put it in direct sun! Moss like to grow in the shade.
- Clean the glass on the inside and outside every once in a while to make sure sunlight can reach the plants. The inside might get cloudy with moss spores.
- Water your terrarium! Get the soil super moist, and the water should collect at the bottom in your rock layer.
- If you put a lid on your terrarium, it will be a self-contained ecosystem. The water cycle will occur in your container and you basically won’t have to ever water it. So cool!
- Open the top every so often to freshen it up and smell it (yup, smell it). If it smells earthy and “foresty”, it’s healthy. If it smells, bad, the soil is probably rotting and you should redo the terrarium with new soil.
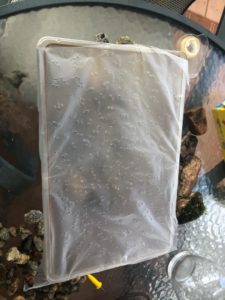
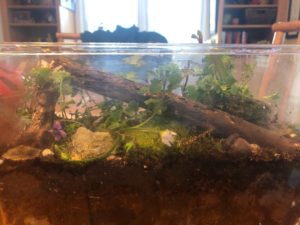
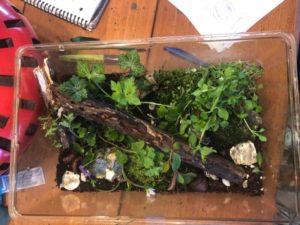
- If you plan on making multiple terrariums, I suggest making a moss propagation bin. This cuts down on your foraging time, and you take less materials from the forest. To do this, fill a plastic bin with dirt and moss. Leave some open spaces to the moss to grow and keep the container moist.
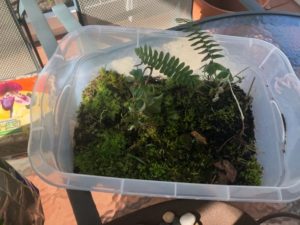
My moss propagation bin.
I hope you all enjoyed this terrarium journey and it gave you some inspiration! For some more resources, check these out:
- Caring for moss
- Terrarium layers
- Creative inspiration and all around awesome terrarium builder
- Common terrarium mistakes
Disclaimer: This terrarium build technically does not follow the principles of Leave no Trace. Be mindful when you are harvesting and try not to take more than what you need. If you are familiar with plants that are slow to reproduce or are rare, try to leave those behind.
About the Author
Alyssa Bialek
 Year in School: Graduate Student
Major: Public Health & Environmental Biology
Hometown: Columbia, MD
Favorite Outdoor Activity: Snorkeling
Favorite Camp Food: Veggie Pizza
Ideal Outdoor Adventure Trip Destination: Backpacking in Iceland and seeing the Northern Lights
If you were stranded on a desert island, what/who would you bring with you: My ukulele and Bear Grylls